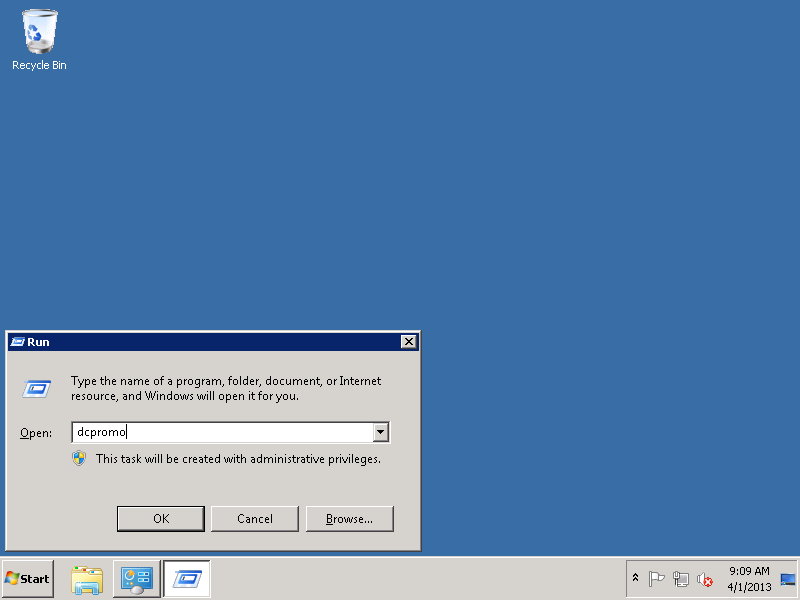
After having our Cloud Server instance provisioned, it is time to perform the initial configuration tasks. Now remember FreeBSD by default will not accept SSH sessions from the root user, so the username that RootBSD assigns to you and that is visible in your control panel is necessary to su to the root user. In this particular instance – they picked my first name as a username which is not the one I would have selected. This is how I nip that issue in the bud right quick:
phocking@bt:~$ ssh phillip@199.48.128.154
The authenticity of host ‘199.48.128.154 (199.48.128.154)’ can’t be established.
RSA key fingerprint is 50:45:19:66:61:46:40:1f:4f:1e:41:5a:3d:98:d2:90.
Are you sure you want to continue connecting (yes/no)? yes
Warning: Permanently added ‘199.48.128.154’ (RSA) to the list of known hosts.
Password:
FreeBSD 9.1-RELEASE (GENERIC) #0 r243826: Tue Dec 4 06:55:39 UTC 2012
Welcome to FreeBSD!
Before seeking technical support, please use the following resources:
o Security advisories and updated errata information for all releases are
at http://www.FreeBSD.org/releases/ – always consult the ERRATA section
for your release first as it’s updated frequently.
o The Handbook and FAQ documents are at http://www.FreeBSD.org/ and,
along with the mailing lists, can be searched by going to
http://www.FreeBSD.org/search/. If the doc package has been installed
(or fetched via pkg_add -r lang-freebsd-doc, where lang is the
2-letter language code, e.g. en), they are also available formatted
in /usr/local/share/doc/freebsd.
If you still have a question or problem, please take the output of
`uname -a’, along with any relevant error messages, and email it
as a question to the questions@FreeBSD.org mailing list. If you are
unfamiliar with FreeBSD’s directory layout, please refer to the hier(7)
manual page. If you are not familiar with manual pages, type `man man’.
Edit /etc/motd to change this login announcement.
$ su
Password:
You have mail.
Our first task is to ensure that we set the root password to a known value:
root@qryr:/usr/home/phillip # passwd
Changing local password for root
New Password:
Retype New Password:
root@qryr:/usr/home/phillip # adduser
Username: phocking
Full name: Phillip Hocking
Uid (Leave empty for default):
Login group [phocking]:
Considering this is a Cloud instance/howto – this is doubly important – but remember that FreeBSD does not accept root logins by default over SSH. So if we fail to add ourselves to the ‘wheel’ group – we will be unable to su when privilege escalation is needed. So, spare yourself an embarassing n00b helpdesk incident and *always* remember to add yourself to the wheel group:
Login group is phocking. Invite phocking into other groups? []: wheel
Login class [default]:
Shell (sh csh tcsh nologin) [sh]:
Home directory [/home/phocking]:
Home directory permissions (Leave empty for default):
Use password-based authentication? [yes]:
Use an empty password? (yes/no) [no]:
Use a random password? (yes/no) [no]:
Enter password:
Enter password again:
Lock out the account after creation? [no]:
Username : phocking
Password : *****
Full Name : Phillip Hocking
Uid : 1002
Class :
Groups : phocking wheel
Home : /home/phocking
Home Mode :
Shell : /bin/sh
Locked : no
OK? (yes/no): y
adduser: INFO: Successfully added (phocking) to the user database.
Add another user? (yes/no): n
Goodbye!
Now let’s remove the extraneous user. This will kick us out of the SSH session, so aren’t you glad you added yourself to the wheel group? ^_^
root@qryr:/usr/home/phillip # rmuser phillip
Matching password entry:
phillip:*:1001:0::0:0:User &:/home/phillip:/bin/sh
Is this the entry you wish to remove? y
Remove user’s home directory (/home/phillip)? y
Removing user (phillip):Connection to 199.48.128.154 closed by remote host.
Connection to 199.48.128.154 closed.
Log back in with your new credentials:
FreeBSD 9.1-RELEASE (GENERIC) #0 r243826: Tue Dec 4 06:55:39 UTC 2012
Welcome to FreeBSD!
Before seeking technical support, please use the following resources:
o Security advisories and updated errata information for all releases are
at http://www.FreeBSD.org/releases/ – always consult the ERRATA section
for your release first as it’s updated frequently.
o The Handbook and FAQ documents are at http://www.FreeBSD.org/ and,
along with the mailing lists, can be searched by going to
http://www.FreeBSD.org/search/. If the doc package has been installed
(or fetched via pkg_add -r lang-freebsd-doc, where lang is the
2-letter language code, e.g. en), they are also available formatted
in /usr/local/share/doc/freebsd.
If you still have a question or problem, please take the output of
`uname -a’, along with any relevant error messages, and email it
as a question to the questions@FreeBSD.org mailing list. If you are
unfamiliar with FreeBSD’s directory layout, please refer to the hier(7)
manual page. If you are not familiar with manual pages, type `man man’.
Edit /etc/motd to change this login announcement.
Now we have a lot of things to do in order to make our userland a little more of an enjoyable experience. The default Bourne shell (/bin/sh) is a fantastic login shell, but a pretty shitty interactive one. Our first task now that we have credentials straightened out is to fetch the ports repository so we can begin installing applications:
$ su
Password:
You have mail.
root@qryr:/usr/home/phocking # portsnap fetch update
Looking up portsnap.rootbsd.net mirrors… none found.
Fetching snapshot tag from portsnap.rootbsd.net… done.
Fetching snapshot metadata… done.
Updating from Mon Apr 1 17:25:36 EDT 2013 to Mon Apr 1 22:40:29 EDT 2013.
Fetching 3 metadata patches.. done.
Applying metadata patches… done.
Fetching 0 metadata files… done.
Fetching 1 patches. done.
Applying patches… done.
Fetching 0 new ports or files… done.
Removing old files and directories… done.
Extracting new files:
/usr/ports/comms/fldigi/
Building new INDEX files… done.
The only thing Linux has by default that I envy FreeBSD is having bash as the default shell. The default bash prompt is far more useful – and while we could dick around with .profile for cosmetic reasons if we were not *real* systems engineers… I wholeheartedly believe it makes a lot more sense just to install bash. Also, portmaster is a robust tool for managing installations and upgrades of ports. It’s advanced features are really cool, but most importantly it allows for less typing when installing ports – so of course we need it. Portmaster can install bash with completions as part of it’s installation – so let’s do that.
root@qryr:/usr/home/phocking # cd /usr/ports/ports-mgmt/portmaster/ && make WITH_BASH=”YES” WITH_PKGNGPATCH=”YES” install clean
Then we need to install the new pkgng system described here – http://www5.us.freebsd.org/doc/en_US.ISO8859-1/books/handbook/pkgng-intro.html – for easier updates and installation of packages in the future.
root@qryr:/usr/home/phocking # portmaster ports-mgmt/pkg
===>>> Currently installed version: The package management tool is not yet installed on your system.
Do you want to fetch and install it now? [y/N]:
===>>> Port directory: /usr/ports/ports-mgmt/pkg
Now that we have installed pkgng we need to convert to the new package database:
root@qryr:/usr/home/phocking # pkg2ng
Creating backup pkg_info(1) database directory in /var/db/pkg.bak.
Installing bash-4.2.42… done
Installing bash-completion-2.0,1… done
Installing bison-2.7,1… done
Installing dialog4ports-0.1.3… done
Installing gettext-0.18.1.1_1… done
Installing gmake-3.82_1… done
Installing libiconv-1.14_1… done
Installing libtool-2.4.2… done
Installing m4-1.4.16_1,1… done
Installing perl-5.14.2_3… done
Installing portmaster-3.16… done
Conversion has been successfully finished
Your old packages database has been moved to: /var/db/pkg.bak.
cd /usr/ports/shells/bash && make install
<snip>
Compressing manual pages for bash-4.2.42
===> Registering installation for bash-4.2.42
Now that we have our fancy (some unixbeards would say sissy) interactive shell installed, let’s install and enable the bash-completion port so we can have more economy of motion while on the command line tabbing through stuff. If you never have installed this, well… you have wasted a lot of time on the CLI typing shit out when you could have been cruise control for cool tabbing through it like a boss!
root@qryr:/usr/ports/shells/bash # cd /usr/ports/shells/bash-completion && make install
<snip>
=====================================================================
To enable the bash completion library, add the following to your .bashrc file:
[[ $PS1 && -f /usr/local/share/bash-completion/bash_completion.sh ]] && \
source /usr/local/share/bash-completion/bash_completion.sh
See /usr/local/share/doc/bash-completion/README for more information.
===> Registering installation for bash-completion-2.0,1
^^^^^^^^^^———-I suggest you do this
=====================================================================
Next up, our first task is to install sudo. Why? Some old unixbeards might be saying ‘eeeeeewwwwwwwwww I don’t want my BSD box to even use utilities derived from linux!’ without understanding all of the implications and benefits of sudo.
1: *AUDIT TRAIL, AUDIT TRAIL, AUDIT TRAIL!!!!! * Every time sudo is attempted let alone successfully invoked, you get a log entry which includes the user performing the action requiring (or at least they think they require) root privileges. My own personal set of best practices always includes setting up a remote ‘tank’ to contain syslog entries in case of some catastrophic event. This also allows our network to be NMS/IDS friendly from the get.
2: Whether you are just banging away at the command line carelessly, or flailing upon your keyboard in rage and curses that would be stronger than any DDoS if they could travel over TCP/IP, the extra half second one has to evaluate what they are about to do as it takes to type sudo can be absolutely priceless.
3: Security best practices along with unixbeard/network ninjitsu proficiency tell us always to work with the lowest amount of privileges necessary to accomplish a given task. Assuming that you haven’t done anything weird, you shouldn’t be able to do shit outside of ~ on FreeBSD by default in the sense of write actions. A lot of Linux admins disregard this as distros do not make the distinct separation between the operating system itself and userland programs.
4: Sudo makes it possible to provide other administrators (particularly junior ones) with the ability to perform root tasks and never know the root password. So whenever you are having a BOFH day and decide to rid yourself of a troublesome PFY – you don’t need to go around and change all the credentials for machines they had access to – simply rmuser.
5: If you do something stupid and run into a site down ‘format and reinstall, you’re fucked’ scenario – at least you know it is your own fucking fault because you put sudo in front of your fail instead of blaming fat fingers or a typo.
This aforementioned distinction is worth going into in greater detail and ultimately is one of the most powerful tools FreeBSD offers as a UNIX platform. All of the system-specific configurations are in /etc with installed software in /usr/local/etc. My biggest beef with linuces that pollute the fuck out of /etc is that it becomes necessary to install and configure softwares individually when it becomes necessary to retire or add to a pool of servers.
The repercussions are far reaching for predictability, scaling, and administration in your enterprise solutions; assuming the same major/minor revision and ARCH match from a source to target – you can drop a simple tarball (or in the days of GigE – scp) of /usr/local from source machine to target to effectively ‘clone’ a server. To do this same sort of thing in Linux Cloud environments requires dicking around with creating images and stages to accomplish the same task because the filesystem is not segregated.
root@qryr:/usr/ports/shells/bash-completion # portmaster security/sudo
<snip>
===> SECURITY REPORT:
This port has installed the following binaries which execute with
increased privileges.
/usr/local/bin/sudo
If there are vulnerabilities in these programs there may be a security
risk to the system. FreeBSD makes no guarantee about the security of
ports included in the Ports Collection. Please type ‘make deinstall’
to deinstall the port if this is a concern.
For more information, and contact details about the security
status of this software, see the following webpage:
http://www.courtesan.com/sudo/
Add yourself to sudoers. I prefer using the wheel group with the NOPASSWD option. I also like trying to make stages like this that folks (even if it is only me) can reproduce in as little time as possible. I also like coming up with ways to do things super quick in vi, so try this one on for size:
root@qryr:/usr/ports/security/sudo # vi /usr/local/etc/sudoers
86G
x
wq!
root@qryr:/usr/ports/security/sudo #
^d
$ vi ~/.bashrc
[[ $PS1 && -f /usr/local/share/bash-completion/bash_completion.sh ]] && \
source /usr/local/share/bash-completion/bash_completion.sh
ZZ
^d
$ ^DConnection to qryr.x.rootbsd.net closed.
phocking@bt:~$ ssh qryr.x.rootbsd.net
Password:
Last login: Tue Apr 2 10:06:14 2013 from c-67-165-123-62.hsd1.wa.comcast.net
FreeBSD 9.1-RELEASE (GENERIC) #0 r243826: Tue Dec 4 06:55:39 UTC 2012
Welcome to FreeBSD!
Before seeking technical support, please use the following resources:
o Security advisories and updated errata information for all releases are
at http://www.FreeBSD.org/releases/ – always consult the ERRATA section
for your release first as it’s updated frequently.
o The Handbook and FAQ documents are at http://www.FreeBSD.org/ and,
along with the mailing lists, can be searched by going to
http://www.FreeBSD.org/search/. If the doc package has been installed
(or fetched via pkg_add -r lang-freebsd-doc, where lang is the
2-letter language code, e.g. en), they are also available formatted
in /usr/local/share/doc/freebsd.
If you still have a question or problem, please take the output of
`uname -a’, along with any relevant error messages, and email it
as a question to the questions@FreeBSD.org mailing list. If you are
unfamiliar with FreeBSD’s directory layout, please refer to the hier(7)
manual page. If you are not familiar with manual pages, type `man man’.
Edit /etc/motd to change this login announcement.
[phocking@qryr /usr/home/phocking]$
And now we are working with a very friendly and consistent but still barebones FreeBSD install. This post is part one of a series on FreeBSD systems engineering management.


Homeless Man Saves Police Officer
22 Janthis is awesome. i think the most awesome part is the hobo who rushes to the cop’s aid is a crip gangster who obviously by looking at him and his mannerisms/vocab spent more of his life in prison than on the streets heh.
i had this dude try to stab me this summer for not letting him use my cell phone (not because i refused, but because it was broken and wouldn’t dial out) and this homeless dude (well, i was/am homeless too lolol) curly smashed him out with a metal water bottle and got him to chase him up the block to the satellite where he threw him through the window.
the cops said all the street kids were heroes that night. curly had gotten a sit/stand/lie citation two hours before he saved my life lol. these are the stories not told by the mainstream media because being afraid of your neighbor makes so much better copy and grabs so many more eyeballs than the truth. :p
#streetstories #homeless
Tags: actually happened to me, commentary, homeless, narrative, sleeplessinspokane